Voice Over Booth – MAS Room 114
ROOM 114 VO ROOM
The NEW system for Voice-Over in 114 :
- Computer stays ON
- Please clean up and leave the room as it was when you arrived – or better 🙂
- Large TV monitor and booth cue monitor are connected to the computer – mirror
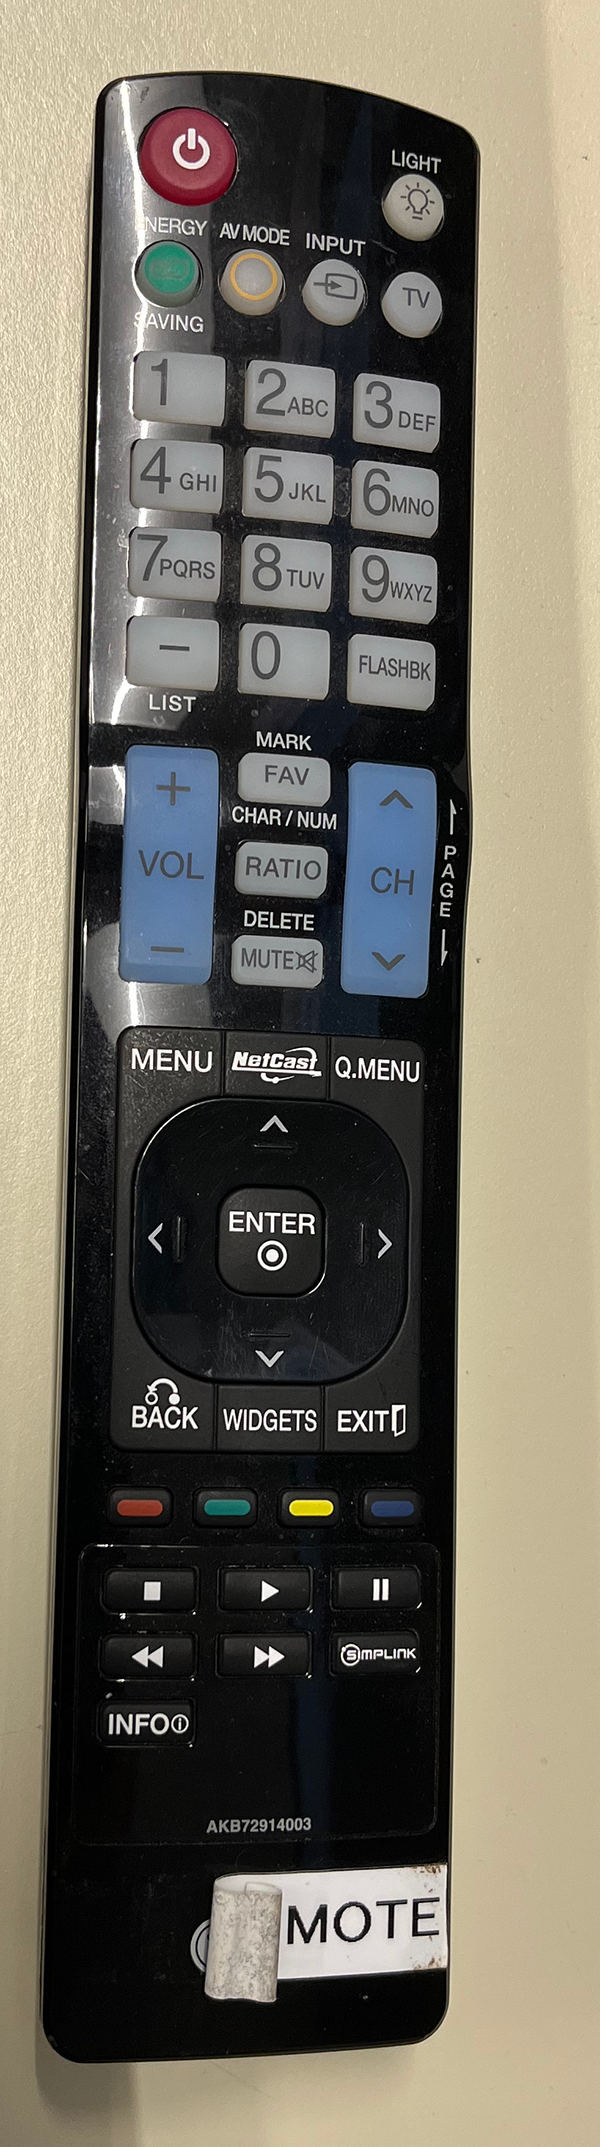
- Use the remote for the large TV if needed

PROCEDURE:
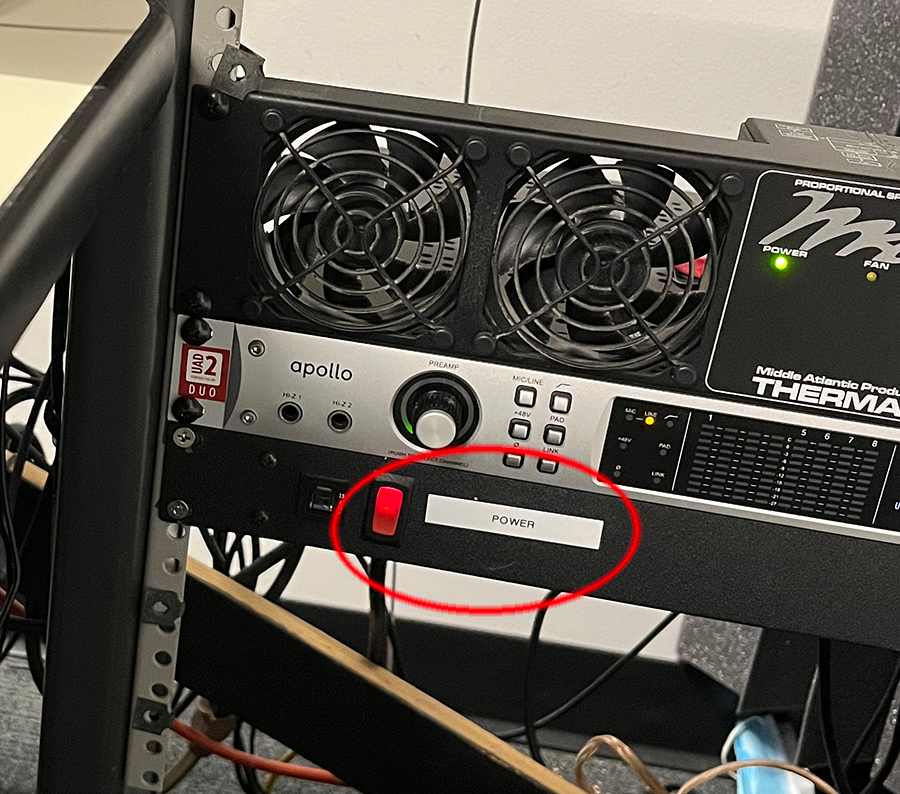
1) SWITCH ON main power (Down and to your right in the mini-rack)
2)
The booth has an AKG 414 CONDENSER mic 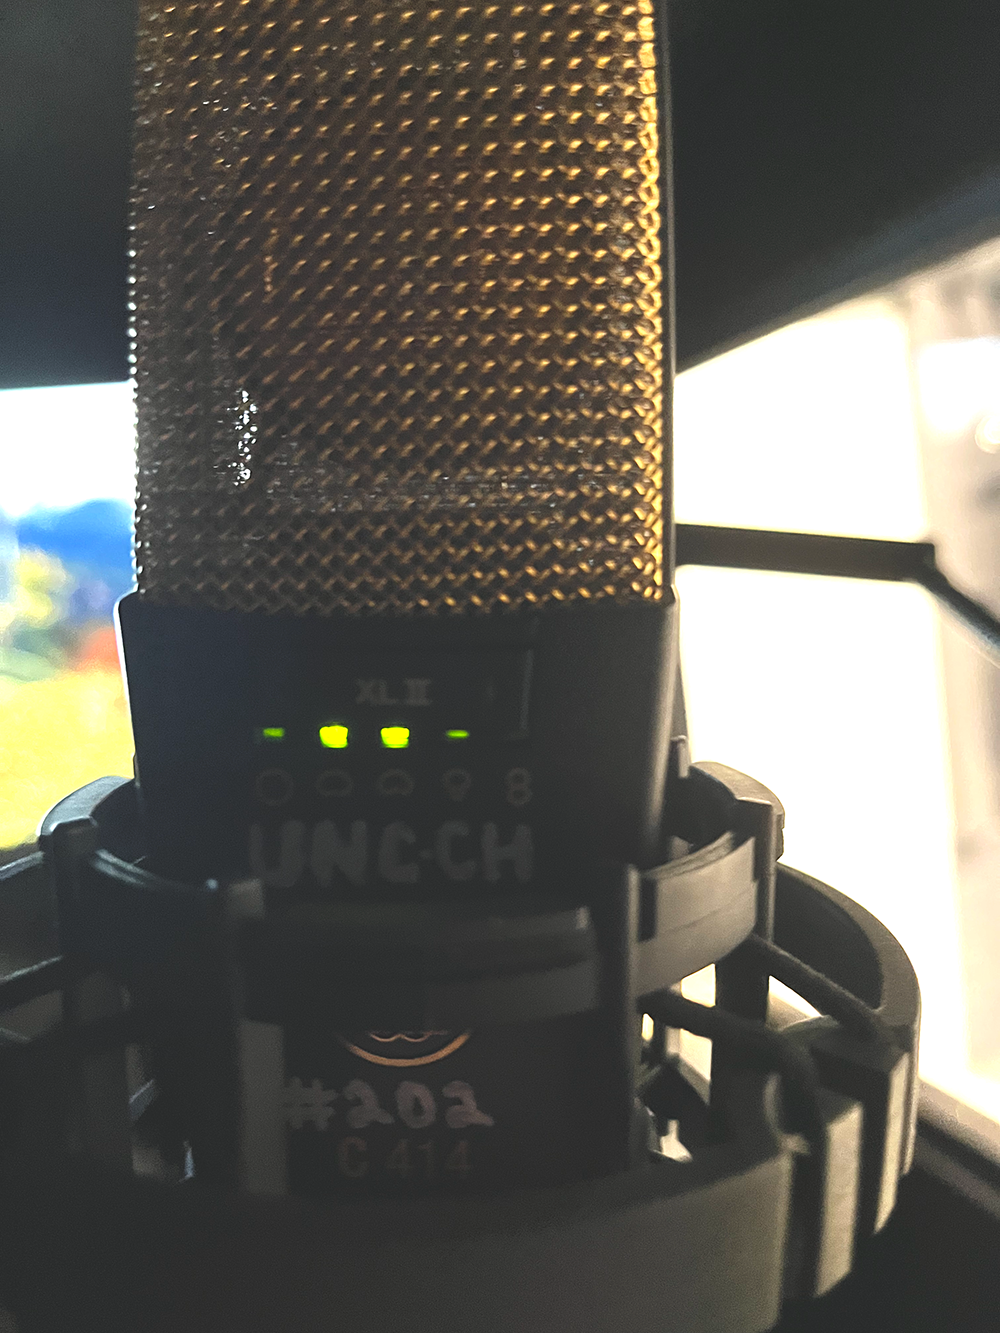
THUS REQUIRES PHANTOM POWER (+48V) 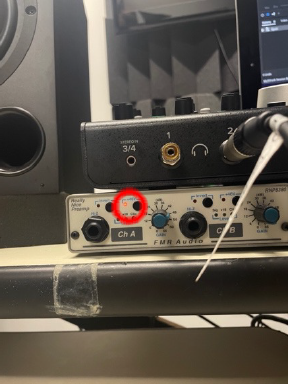
The mic has a pop screen which should locate the talent in front of the mic
3) The mic is plugged into the base-plate under the booth monitor, near the floor. The talent plugs in headphone to
the corresponding port and the mic is in INPUT 1(A)
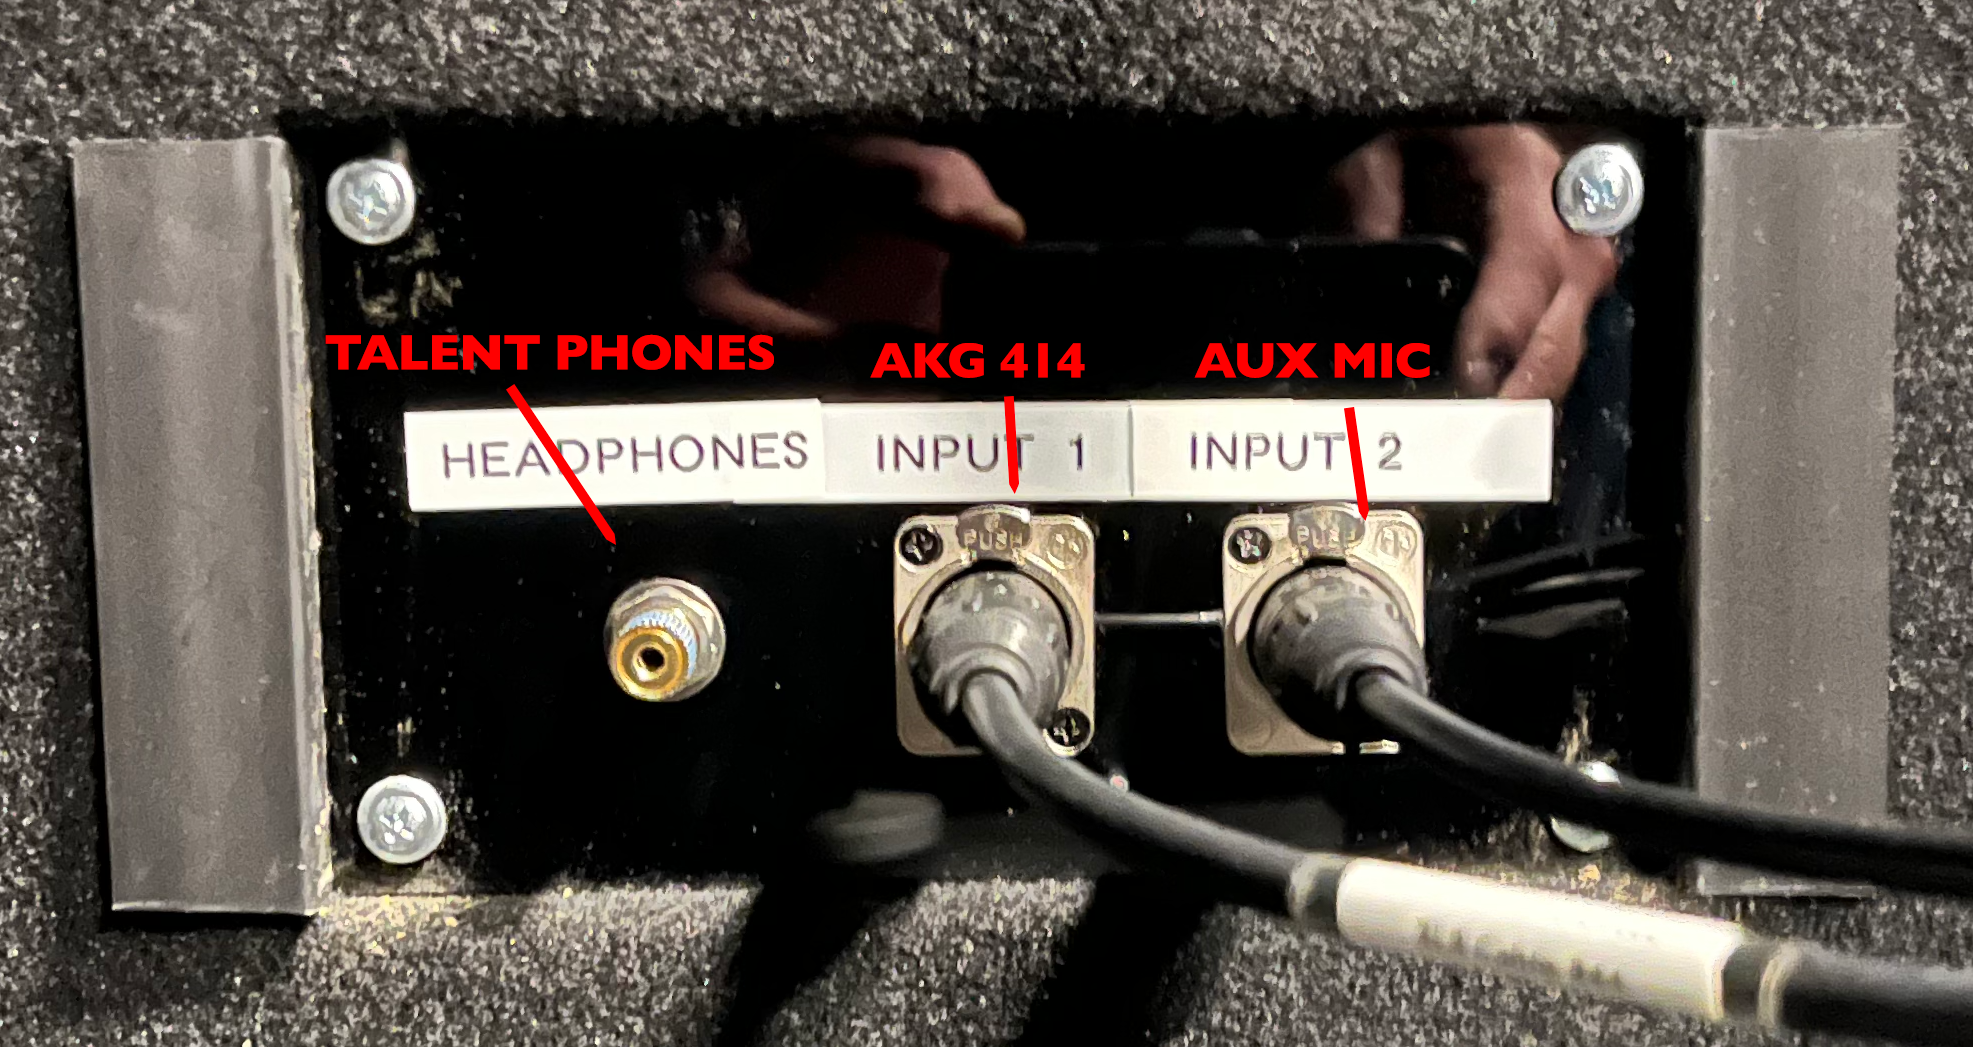 INPUT 2 (B) is available for a 2nd MIC should you desire. You will have to reserve the 2nd mic via Connect2
The signal chain is MIC–> INPUT A –> RNP Preamp –> RNC Compressor –> MACKIE BIG KNOB –> via USB –> Mac (Premiere/Audition)
4) The Mic(s) in the booth are wired through the RNP PRE-AMP
The VO mic will be coming to channel A on the preamp, which will require phantom power.
PHANTOM power is the button marked +48V on the face of the Pre-Amp. A red light indicates +48V (Phantom Power) is active.
5)The two PRE-AMP knobs control ‘Volume’ (gain) of the mic input A and B respectively

6) Decide if you want your recording to pass through the RNC-Compressor. If you DON’T want the recording to go through the compressor, or you just aren’t sure what a compressor is THEN press the BYPASS button on the RNC – Compressor. The red light indicates that BYPASS is selected (It doesn’t matter how the knobs are set, the compressor will be bypassed.)

7) Pictured below is the MACKIE BIG KNOB. Please note the highlighted buttons which are depressed and the gain on INPUT 1 and 2 should indicate TWO (2) – THREE (3) O’clock
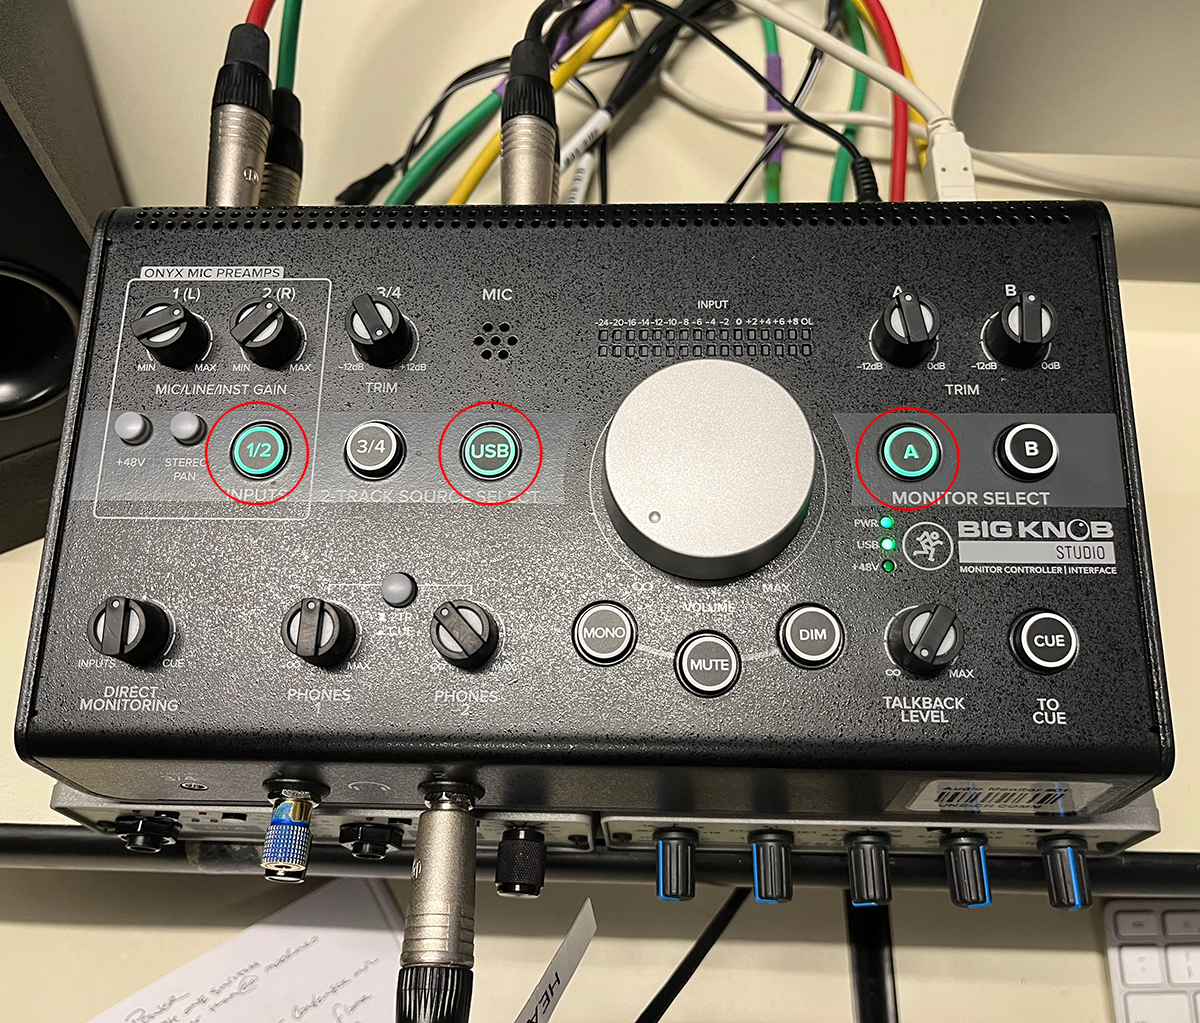
The large volume knob should be turned all the way to the LEFT, while recording. The monitor volume knob should only be used to monitor the tracks IF AND WHEN no track is selected to RECORD!
Then, To hear the recording through the near-field monitors (speakers), make sure Monitor A is selected on the BIG KNOB and adjust the volume with such.
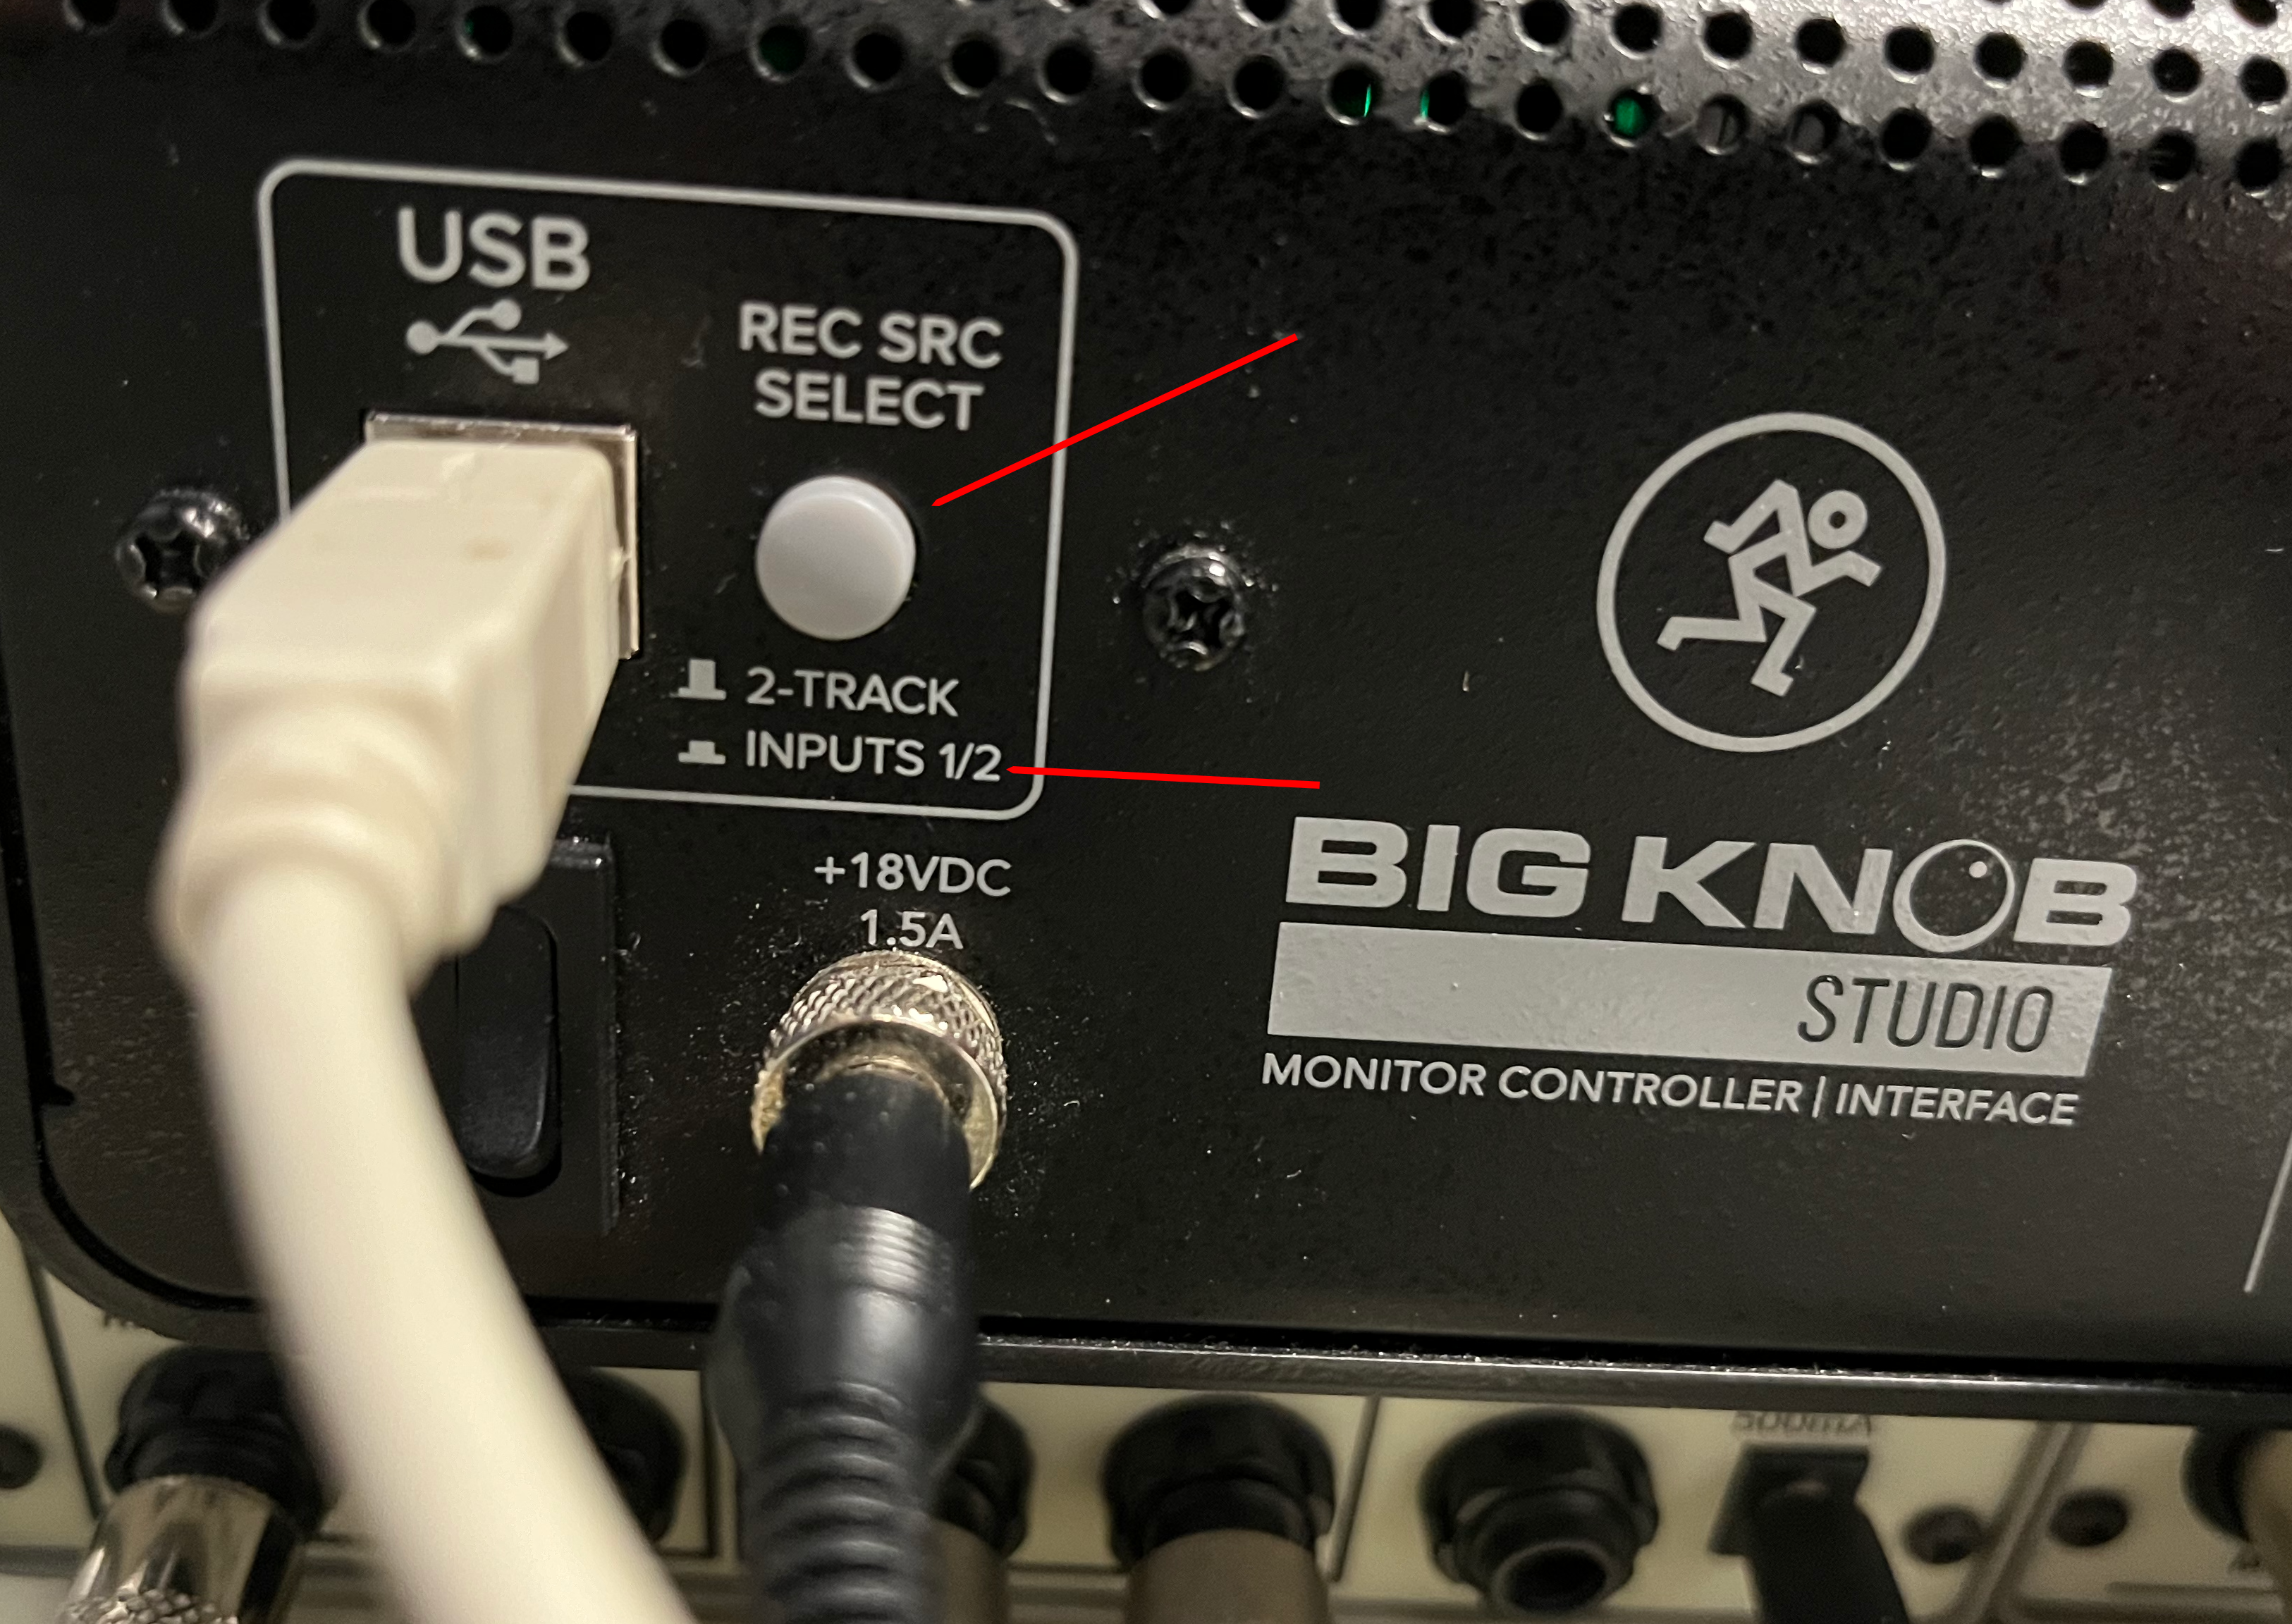
8) On the back of the Maackie the small button next to the USB connector NEEDS to be depressed to indicate INPUTS through TRACKS 1 and 2.
ON THE COMPUTER:
- On the computer SYSTEM PREFERENCES —> SOUND—> input and output set to Mackie Big Knob USB
- In Premiere or Audition – FILE—> PREFERENCES —> AUDIO HARDWARE. Set both the input and output to Mackie Big Knob
- Look to Application Recording SECTION A (below)
Recording
On the computer:
- Launch APPLICATION (Premiere or Audition)
AUDITION:
- Open a multitrack session
- In a track (ex.Track 01) select the Record Monitor Button. It will turn red when you click.
- Go to the top pulldown in that track which corresponds to the INPUT . Select BIG KNOB (Mackie)
- Set levels using the Preamp gain control (pictured above) AND the INPUT 1/2 Gain pots on the MACKIE. The Gain of the MACKIE Input should NEVER be below the gain of the Pre-Amp.
- Press RECORD in the transport.
- Track is saved in sub folder Audio Files but one can select a track and FILE –> EXPORT –> Multitrack Mixdown –> selected clip(s). Save as a *.WAV or *.AIFF 48kHz 16bit (min)
PREMIERE:
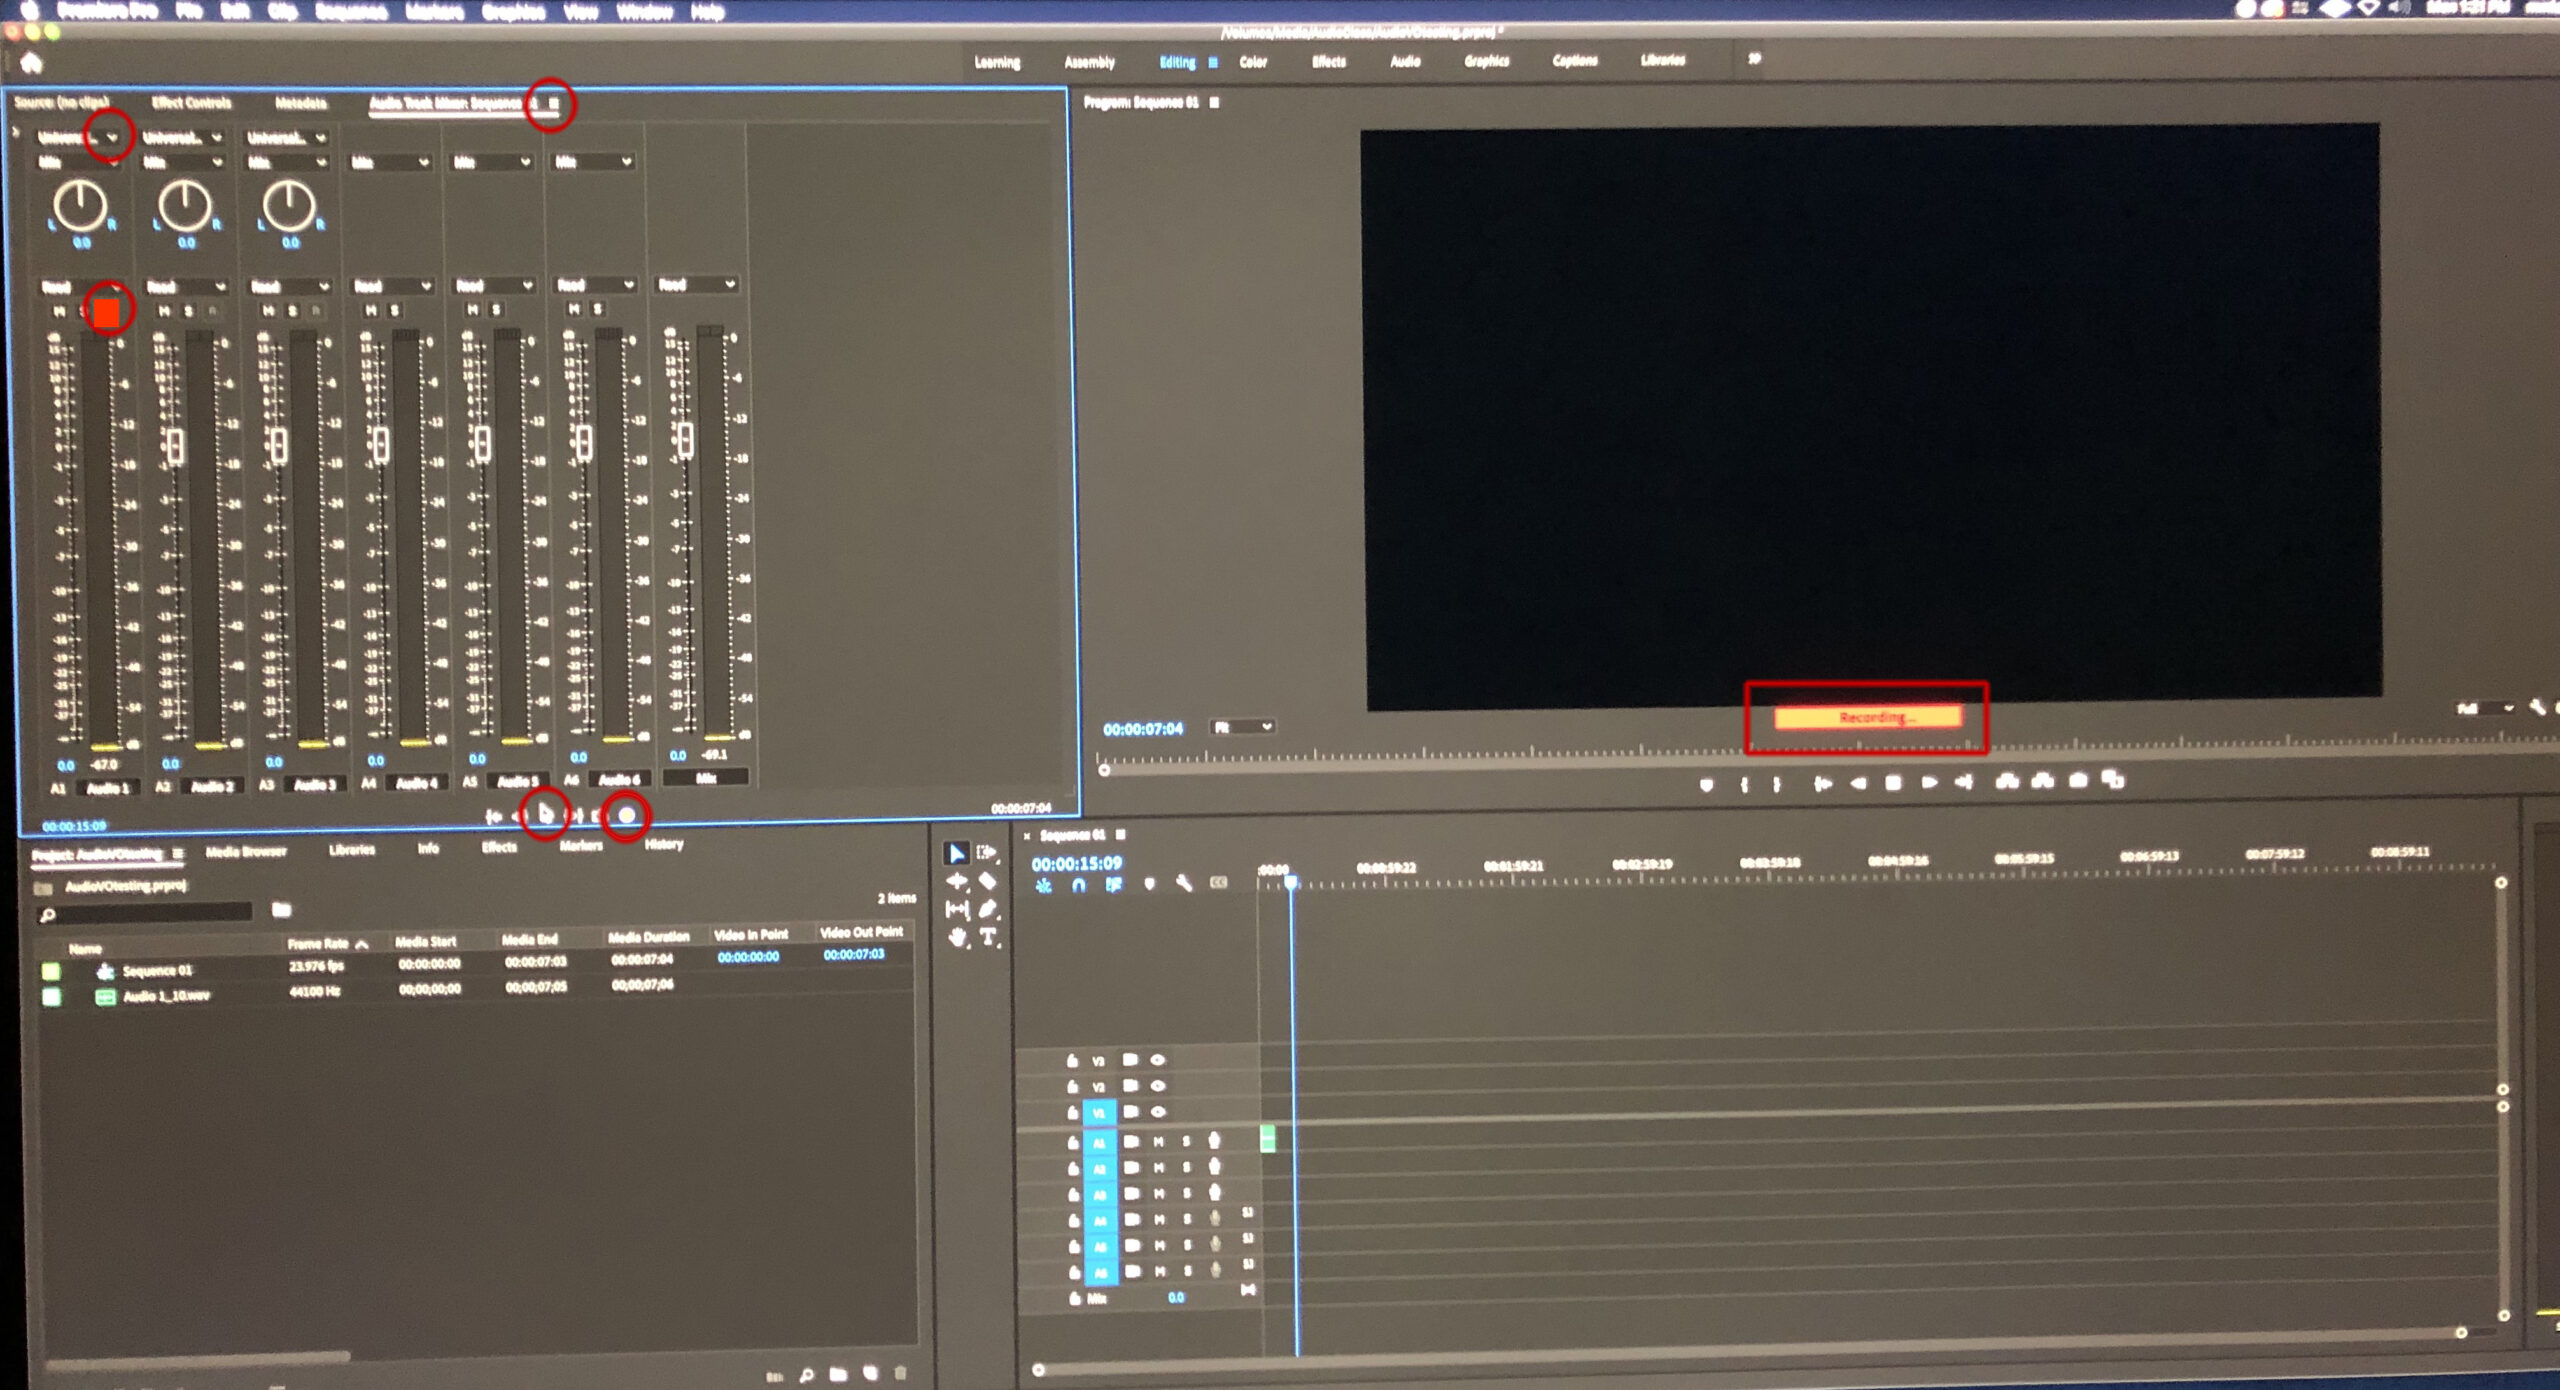
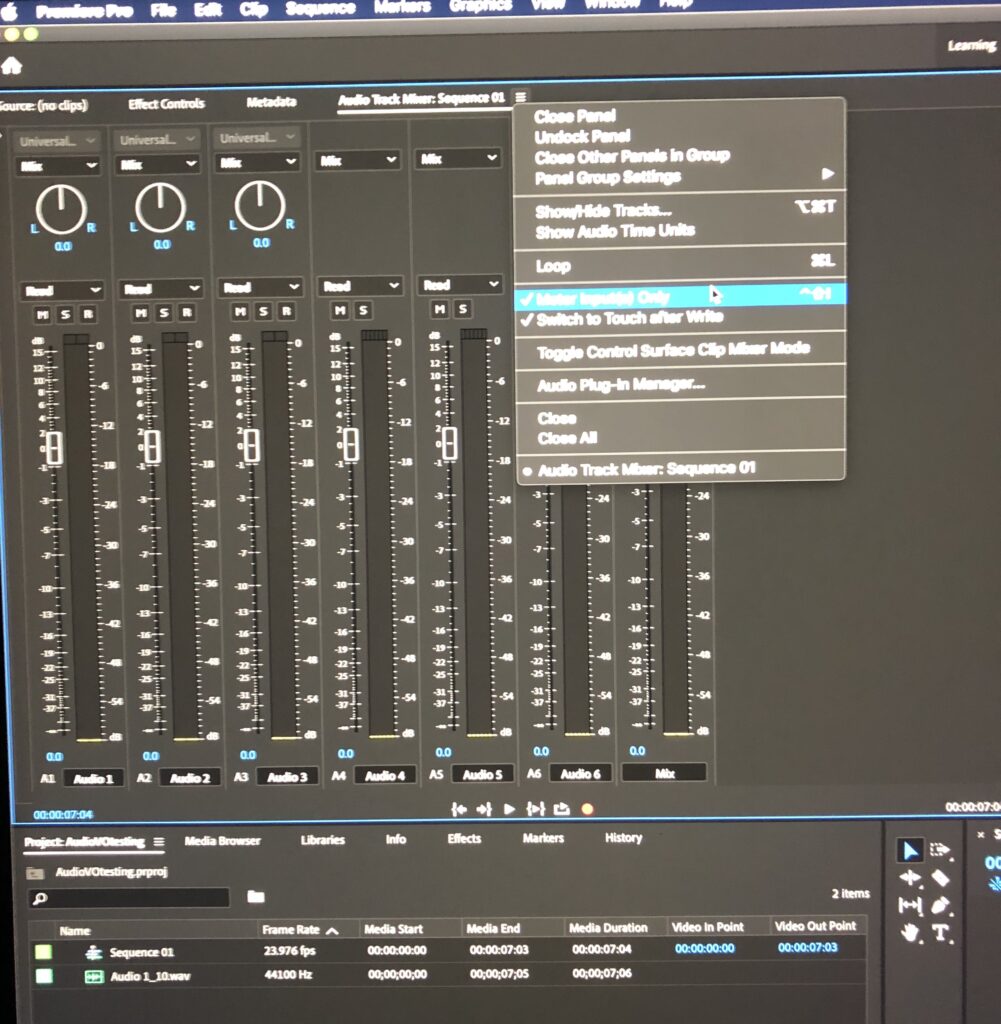
- Under WINDOW, select AUDIO TRACK MIXER Sequence 01 (or your sequence title)
- In AUDIO TRACK MIXER window select micro-menu – METER INPUTS ONLY
- Select the Record monitor for the track you plan to record to (R)
- TOP pull-down selection for INPUT needs to read BIG KNOB
- SET LEVELS!! Use the PREAMP GAIN CONTROL (see #4 in PROCEDURE above)
- Click red circle (record button) in transport results in a blue halo around red button icon, then press Play and the RECORDING light under the clip should engage and the playhead start moving.
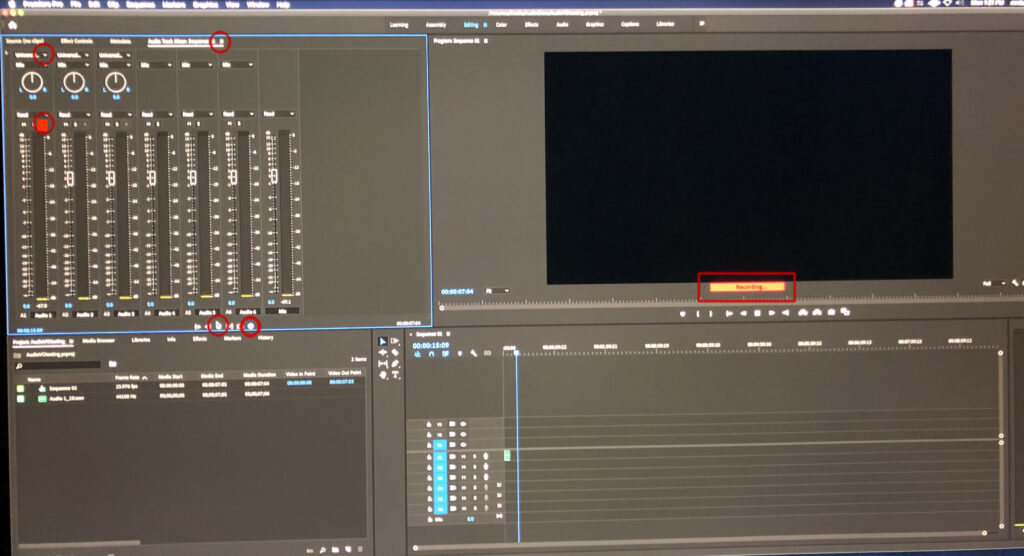
- When finished with recording click the square icon in the transport or hit the spacebar. The waveform should generate in the sequence timeline
- The recording is saved to your project folder – in the AUDIO FILES folder.
- Your files can be copied to an external drive, or OneDrive etc.
- If you prefer, you can export the audio in the tracks by selecting the tracks, FILE–>Export –> Media and save as a *.WAV or *.AIFF 48kHz 16bit (min)